Wednesday, December 15, 2010

Oak Barrel Aging for Homebrewers (Part 3)


The day of transferring our Russian Imperial Stout to our new 55 gallon American Oak (heavy charred) barrel was finally upon us.  With the winter's first blanket of snow outside we finally were ready to take the 12 fermentation vessels of beer and get them into an oaky new home!  We brewed this beer on October 30th and wanted to give it time to really finish out before introducing it to the barrel.  We transferred it from bucket to barrel on December 12th which gave it about 43 days to completely ferment and settle out.

We followed our prescribed steps to preparing the barrel found HERE.  Unfortunately, after letting the barrel fully soak up the water and expand, and filling the barrel with a water/barrolkleen mixture, we discovered a tiny leak in the end of the barrel.  To fix this problem, a small wedge of natural cork was cut and hammered into the hole.


After soaking up liquid, the cork followed the oak's lead and expanded, thus stopping the leak!  After fixing the leak and cleaning away the barrolkleen, we moved on to the next step.  We dissolved 1 Oz. of citric acid and 2 Ozs. of sodium metabisulfite into 2 gallons of warm water, and used this mixture to rinse the inside of the barrel for about 10-15 minutes.  This was done to kill any wild bacteria/yeasts.


We rinsed the barrel out until the water was running clear, and put it on it's stand where it will rest
until the beer is ready.


We moved all of the buckets to the garage so that they were ready to transfer.  My HERM's system has a March pump attached to the body, and we wanted to use this to move all of the beer instead of the tedious task of siphoning it all.  We set this all up and then took a set of Final Gravities which averaged about 10 Brix. After adjusting for the alcohol, we came up with a calculated ABV of around 9-9.25%.


It tasted pretty good and will definitely benefit from the added complexities of the oak barrel.  We made 60 gallons of the beer originally.  We put 55 gallons in the barrel and kept 5 gallons in a carboy to age as a control.  This will give us an idea of what the stout tasted like sans oak flavor.  Because this is a new barrel we will probably start testing the flavor fairly soon as to make sure and get the beer off of the oak before it becomes to flavor dominant.  Overall the process went smoothly and we are excited to taste the results!  Cheers and we look forward to letting everyone know how this turns out!
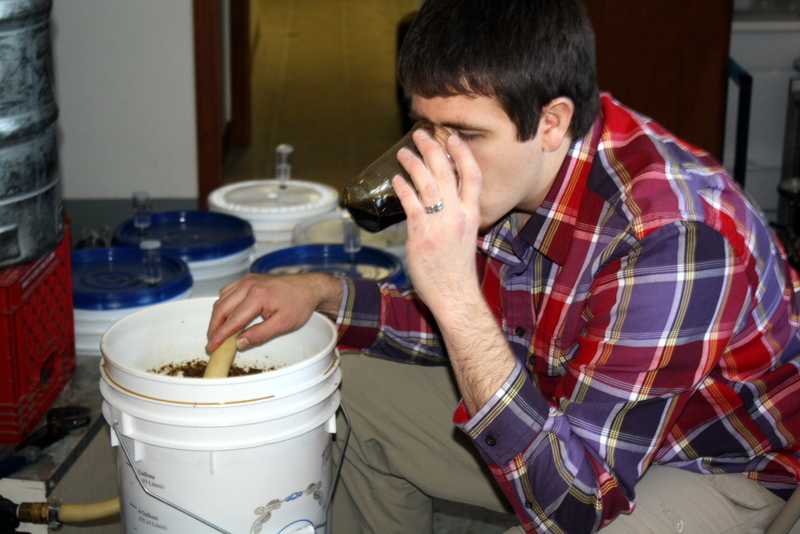


All photos courtesy of Libby Connell

Saturday, November 20, 2010

Cooking with Brewing Equipment - Sous Vide Style!

I came across an article earlier this week about Dr. Nathan Myhrvold, a Microsoft millionaire who decided to follow his passion for cooking and develop a cookbook.  This cookbook (http://modernistcuisine.com/) started as a pet project that was supposed to be 300 pages and ended up taking over three years to develop and is 2400 pages long!  In the article it talked about his use of Sous Vide (http://en.wikipedia.org/wiki/Sous-vide) which is a style of cooking re-discovered in the 60's and 70's that has been slowly spreading around the world.

Right now, it is used mainly in high-end restaurants around the world.  However, there has been a slow adoption among home based chefs and it has been increasing in popularity recently.  This website has some interesting information on it (http://www.cookingsousvide.com/).  The basic idea of the cooking style is to use precise temperature control to cook a meat EXACTLY to the desired temperature of serving, without the possibility of overcooking it.  To do this, the meat is vacuum sealed with some spices/herbs. 


Then the vacuum sealed package is placed into a temperature controlled water bath.


Coincidentally, my Hot Liquor Tank has a PID controller on it which can precisely control it's temperature.  This is where it relates to brewing beer.  Anyone with a brewing setup that can control water temperature for an extended period of time has the equipment to try this cooking method!  We decided to make some Chicken Marsala, so... we placed some flattened chicken breasts, salt, pepper, and sprigs of fresh thyme in a vacuum sealed bag and put them in 141 degree water for approximately two hours.  At 141 degrees, it takes about 20 minutes for all bacteria to be killed (http://www.cookingsousvide.com/story_image/image/92/sous-vide-chicken-cooking-time.png).  As the meat remains in solution, it becomes more and more moist as the proteins continue to break down.  Ours came out IMMENSELY moist and tender.  It really was amazing. 


Once removed from the pouches, we patted them dry while heating some extra virgin olive oil until it was smoking.  We then floured the chicken and flash seared them on both sides (less than a minute on both sides).  This achieved the proper maillard reaction to brown the chicken up both for added flavor and for presentation. 


After searing, we added some butter and baby portabello mushrooms to the skillet for 5 or 6 minutes until they soaked up all the EVOO and goodness.  After that we added 3/4 cup Marsala wine and 3/4 cup chicken stock and let it reduce for 10-15 minutes on medium.  We added 2 tablespoons of butter and poured over the chicken.  Finally, we garnished with some chopped Italian parsley. 


The chicken took on a new texture that was more moist and tender than any chicken I have had before.  It was absolutely delicious.  We paired it with some steamed broccoli and citrus/pecan/spinach salad.  All of it was delicious.  This is the recipe we loosely followed (http://www.cookingsousvide.com/info/sous-vide-recipes/more/sous-vide-chicken-marsala).  The cooking process itself is amazing because you CAN'T overcook it, which means it is basically error free.  The only work is vacuum sealing it, and setting the temp., after that a quick searing in a pan or on the grill and it is set to go!  I would highly recommend trying this out if your brewing equipment is capable.  It was really fun, interesting, and we look forward to perfecting the style to impress our guests! 

Please try this out and post results!  We'd love to hear from other people who have tried this! 

Tuesday, November 2, 2010

Oak Barrel Aging for Homebrewers (Part 2)

This is the second installment to the Barrel Aging series we are doing.  The link to the first is here....

http://kchopheaven.blogspot.com/2010/06/oak-barrel-aging-for-homebrewers-part-1.html

We finally got around to brewing the beer for this barrel.  Summertime activities seem to occupy precious brewing time, but we did it!  Because we acquired a new, heavy charred, oak barrel; we wanted to use a BIG beer to absorb the concentrated flavors.  This lead us to a Russian Imperial Stout recipe that we believe will help reduce the intensiveness of the flavors from the barrel.

Brew day went very well.  We had three 10-gallon systems up and running from 8:00 a.m. until 6:00 p.m.  We had no hiccups in brewing.  This was probably due to our two beautiful brewing assistants (you know who you are).  This resulted in about 60 gallons of wort to ferment.  All of the initial gravity readings were pretty close to the estimated O.G.  Our microbiologist friend propagated a large concentrated batch of Wyeast #1056 (American Ale) for us.  All twelve of our fermentation vessels (buckets and a carboy) started without a problem within 16 hours and finished out nicely.  They were in a hallway that remained at about 66 degrees Fahrenheit.

Overall it was a great brew and we will be detailing the build for the stand and the transferring of the stout into the barrel soon.  

RECIPE:

BeerSmith Recipe Printout - http://www.beersmith.com
Recipe: Oak Barrel Stout
Brewer: Thomas Sanford Asst Brewer:
Style: Russian Imperial Stout
TYPE: All Grain
Taste: (35.0)

Recipe Specifications --------------------------
Batch Size: 10.00 gal
Boil Size: 12.38 gal
Estimated OG: 1.090 SG
Estimated Color: 56.1 SRM
Estimated IBU: 72.3 IBU
Brewhouse Efficiency: 75.00 %
Boil Time: 60 Minutes

Ingredients: ------------
Amount Item Type % or IBU
25 lbs Pale Malt (2 Row) US (2.0 SRM) Grain 72.46 %
3 lbs Caramel/Crystal Malt - 80L (80.0 SRM) Grain 8.70 %
2 lbs 8.0 oz Roasted Barley (300.0 SRM) Grain 7.25 %
1 lbs 8.0 oz Oats, Flaked (1.0 SRM) Grain 4.35 %
1 lbs Black (Patent) Malt (500.0 SRM) Grain 2.90 %
1 lbs Chocolate Malt (350.0 SRM) Grain 2.90 %
8.0 oz Special B Malt (180.0 SRM) Grain 1.45 %
2.00 oz Goldings, East Kent [5.00 %] (60 min) Hops 13.5 IBU
2.00 oz Cascade [5.50 %] (60 min) Hops 14.9 IBU
1.00 oz Goldings, East Kent [5.00 %] (45 min) Hops 6.2 IBU
2.00 oz Northern Brewer [8.50 %] (45 min) Hops 21.1 IBU
2.00 oz Cascade [5.50 %] (30 min) Hops 11.4 IBU
1.00 oz Goldings, East Kent [5.00 %] (10 min) Hops 2.5 IBU
1.00 oz Cascade [5.50 %] (10 min) Hops 2.7 IBU
10.00 gal Kansas City, KS Water
1 Pkgs American Ale (Wyeast Labs #1056) Yeast-Ale

Mash Schedule: Double Infusion, Medium Body
Total Grain Weight: 34.50 lb ----------------------------
Double Infusion, Medium Body
Step Time Name Description Step Temp
70 min Saccrification Add 27.60 qt of water at 172.7 F 154.0 F
10 min Mash Out Add 24.15 qt of water at 187.6 F 168.0 F


Saturday, October 30, 2010

Rebel Smoked Porter

As most homebrewers do I subscribe to the newsletters of online homebrew stores. They send out monthly emails highlighting specials for the month and new products. A little over a month ago I got the newsletter from Rebel Brewer with some awesome new products. One that really caught my eye was Alderwood Smoked Munich Malt. After attending the GABF this year and tasting Alaskan Brewing Smoked Porter I really wanted to try brewing a similar beer. Knowing that Alaskan Smoked Porter used alderwood smoked malt I was in search of any malt I could get my hands on that was smoked with this wood. Rebel Brewer was the first place I found that carried a malt of this variety. I immediately placed an order for 6 pounds of this malt to use in a 12 gallon batch of porter. There was a smoked porter recipe on the website so I figured I would try a variation of that for my first smoked porter. I had a 50 pound bag of 2-row in the basement so all I needed now was the specialty grains and I would be set. Brew day went smooth and I now have 12 gallons of smoked porter in my conical fermenting. I plan on kegging 5 gallons and bottling the rest to age. I think I will try and serve the keg on my stout tap to give it a nice creamy head. Stay tuned for a tasting in the coming weeks.

Recipe: Smoked Porter
Brewer: Ashley Strube
Style: Robust Porter
TYPE: All Grain

Recipe Specifications
--------------------------
Batch Size: 12.00 gal
Boil Size: 15.38 gal
Estimated OG: 1.064 SG
Estimated Color: 28.7 SRM
Estimated IBU: 24.6 IBU
Brewhouse Efficiency: 75.00 %
Boil Time: 60 Minutes

Ingredients:
------------
Amount Item Type % or IBU
18 lbs Pale Malt (2 Row) US (2.0 SRM) Grain 62.61 %
6 lbs Munich Malt (9.0 SRM) Grain 20.87 %
2 lbs Munich Malt - 10L (10.0 SRM) Grain 6.96 %
1 lbs Crystal Malt - 60L (60.0 SRM) Grain 3.48 %
1 lbs Chocolate Malt (350.0 SRM) Grain 3.48 %
12.0 oz Black (Patent) Malt (500.0 SRM) Grain 2.61 %
1.00 oz Nugget [12.20 %] (60 min) Hops 22.1 IBU
0.33 oz Williamette [4.90 %] (30 min) Hops 1.5 IBU
0.33 oz Williamette [4.90 %] (10 min) Hops 0.6 IBU
0.33 oz Williamette [4.90 %] (1 min) Hops 0.5 IBU
1 Pkgs London ESB Ale (Wyeast Labs #1968)

Mash Schedule: Single Infusion, Medium Body
Total Grain Weight: 28.75 lb
----------------------------
Single Infusion, Medium Body
Step Time Name Description Step Temp
60 min Mash In Add 9.00 gal of water at 163.6 F 152.0 F
10 min Mash Out Add 3.80 gal of water at 211.4 F 168.0 F

Sunday, October 17, 2010

Pumpkin Beer

About a month ago I was getting groceries and saw pie pumpkins and I knew it was that time of your again. It is time to brew a pumpkin beer!! I have brewed a pumpkin beer the past three years with great results. I have been trying different techniques and ingredients to see what is easiest and turns out tasting the best. The first year I tried the traditional technique of adding the pumpkin to the mash. It was very messy to say the least. The next year I read about throwing the pumpkin right in the boil. That was way easier and a lot less messy. It also seemed to give the beer a better pumpkin color. So here is what I did this year. First off I bought 4 pie pumpkins at the store. I quartered them and scrapped off all the seeds. If you have some baking pans it is a good idea to wrap them in at least one layer of aluminum foil, two is preferred. This protects the pan from the melting brown sugar that you will put on the pieces. I add brown sugar to each piece and bake in the oven at 350 for 60-90 minutes. This caramelizes the brown sugar and the pumpkin bringing out some nice flavors in the pumpkin. In past years I would stop here but his year they go back into the oven for a second baking. I heard that baking the pumpkin twice brings out more flavors that you cannot get with baking the pumpkin just once.


After it cools you cut the "meat" of the pumpkin away from the outside skin. You are now ready to add this to your boil. Using this method eliminates the worry of a stuck sparge that you could have if you put the pumpkin in the mash. I use a mesh strainer at the end of the boil to remove the pumpkin before I start cooling my wort. I do this because I use a March pump to whirlpool my wort as I chill with my immersion chiller. In the next couple weeks I will be bottling the beer and will post some tasting comments. Until then the recipe is below if you feel like brewing it for yourself. I normally do 12 gallon batches but for this one I bumped it up to 14 gallons to ensure I get 12 gallons at the end of the boil. With all the pumpkin and other protein and trub that will be in the bottom of the kettle I will probably loose two more gallons that normal. Cheers!!


Recipe: Pumpkin Ale
Brewer: Ashley Strube
Style: Spice, Herb, or Vegetable Beer
TYPE: All Grain

Recipe Specifications
--------------------------
Batch Size: 14.00 gal
Boil Size: 16.76 gal
Estimated OG: 1.069 SG
Estimated Color: 13.3 SRM
Estimated IBU: 27.4 IBU
Brewhouse Efficiency: 75.00 %
Boil Time: 60 Minutes

Ingredients:
------------
Amount Item Type % or IBU
18 lbs Pale Malt (2 Row) UK (3.0 SRM) Grain 52.17 %
9 lbs Munich Malt (9.0 SRM) Grain 26.09 %
4 lbs Aromatic Malt (26.0 SRM) Grain 11.59 %
1 lbs 8.0 oz Caramunich Malt (56.0 SRM) Grain 4.35 %
3.00 oz Glacier [6.00 %] (60 min) Hops 27.4 IBU
2.50 tbsp Ginger Root (Boil 12.0 min) Misc
2.50 tsp Nutmeg (Boil 5.0 min) Misc
7.00 tsp Cinnamon (Boil 5.0 min) Misc
9.00 tsp Vanilla Extract (Secondary 14.0 days) Misc
2 lbs Brown Sugar, Light (8.0 SRM) Sugar 5.80 %
2 Pkgs London ESB Ale (Wyeast Labs #1968)

Mash Schedule: Single Infusion, Medium Body, No Mash Out
Total Grain Weight: 32.50 lb
----------------------------
Single Infusion, Medium Body, No Mash Out
Step Time Name Description Step Temp
60 min Mash In Add 11.00 gal of water at 165.0 F 154.0 F

Notes:
------
added 1/4 tsp nutmeg, 1/4 tsp cloves, and 1/2 tsp cinnamon in secondary or at bottling.

-------------------------------------------------------------------------------------